Travel Photography Tips
Written by Kaiti Fasburg. Kaiti is a Michigan based photographer with a focus on nature, wildlife, and travel.
Travel photography is a hobby that I have had a lot of fun with in recent years. I started out as a college student, on my first-ever big trip (which was to the Grand Canyon), and have been obsessed ever since. I’ve toted my Canon Rebel XSi with me on eleven big trips, and a myriad of smaller getaways in the past four years. Each time I go somewhere I learn something new, whether it’s a new technique, a new piece of equipment, or something as simple as a better way to pack and carry my gear. I’ve found that the best way to get great travel pictures involves a lot of practice, preparation, and a firm grasp on what I really want to get out of my overall experience. So, without further delay, here are a few travel photography tips to ensure your vacation or travel photos turn out awesome!
1. Know Your Equipment
It’s always important to practice using any new piece of equipment before heading off on a trip. You should know the best way to make things work before you’re travelling, so you won’t have to waste time fiddling with them once you get to where you’re going.
2. Know Your Destination
Every trip I go on starts with research. “Fun” and “entertaining” aren’t words I would typically associate with research, but I love researching travel destinations, and I will spend hours investigating every angle of my destination online before actually setting off. I want to know as much as the locals do before I depart because although major tourist attractions are great, I also want to see things that the average traveller may miss. This is also how I decide what equipment I will pack, and what I’m looking to capture. For example, in 2016 I’ll be travelling to Scandinavia. My main photographic destination on this trip will be Iceland’s south shore. Through research I’ve managed to add a couple of lesser-known spots to my south coast road trip, and I also know exactly what I have to pack. I will be visiting a few waterfalls, and searching the night sky for the aurora borealis. This means my tripod is on my list of essentials. I’ll also be searching for puffins along the sea cliffs, which means I will need my zoom lens in addition to my wide angle.
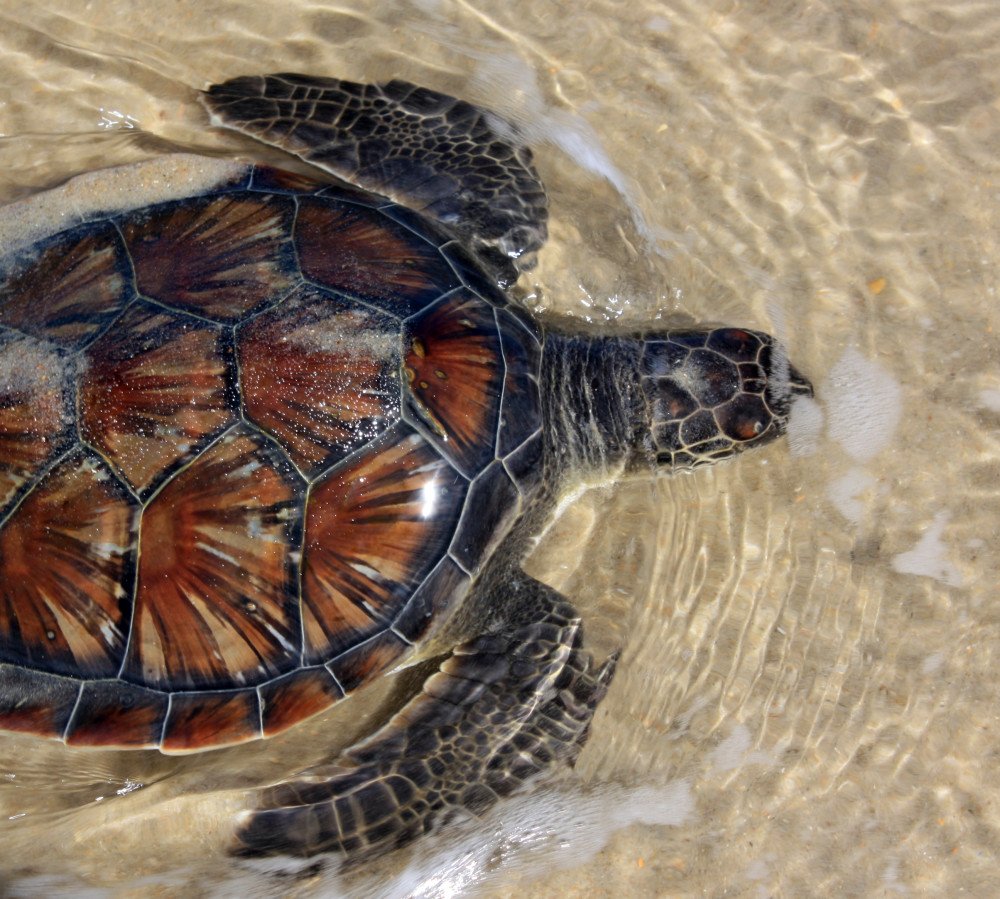
Once I know what I’ll be trying to photograph, and what I’m packing, I’m basically ready to go until the trip actually starts. It’s hard to determine what camera settings I’ll be using until I’m on the scene because it’s hard to reliably account for how the weather will be. Now this is going to sound like photography blasphemy, but whenever I’m shooting, I start in landscape mode and decide what needs to be tweaked from there. Sometimes I’m perfectly happy with the images I’m getting in landscape, and I won’t even bother with switching to manual. I do this because when I’m travelling, I typically have a limited time to get the perfect shot. Color and contrast can be adjusted after-the-fact, but if I’m sitting around playing with camera settings, I may miss my window. Once, a sea turtle swam right up to my feet while I was standing on the shoreline in North Carolina. I had about three seconds to get a shot before the turtle went on its way. Had I wasted time fiddling with camera settings, I would have missed a rare opportunity. There are times when this simply won’t be possible, or I’m trying for a shot that necessitates manual mode such as photographing the night sky, or getting a nice long exposure of a water scene, but I have had a lot of luck using landscape mode.

This photo was made possible by the random whim of a hungry sea turtle, landscape mode, and my shutter happy index finger.
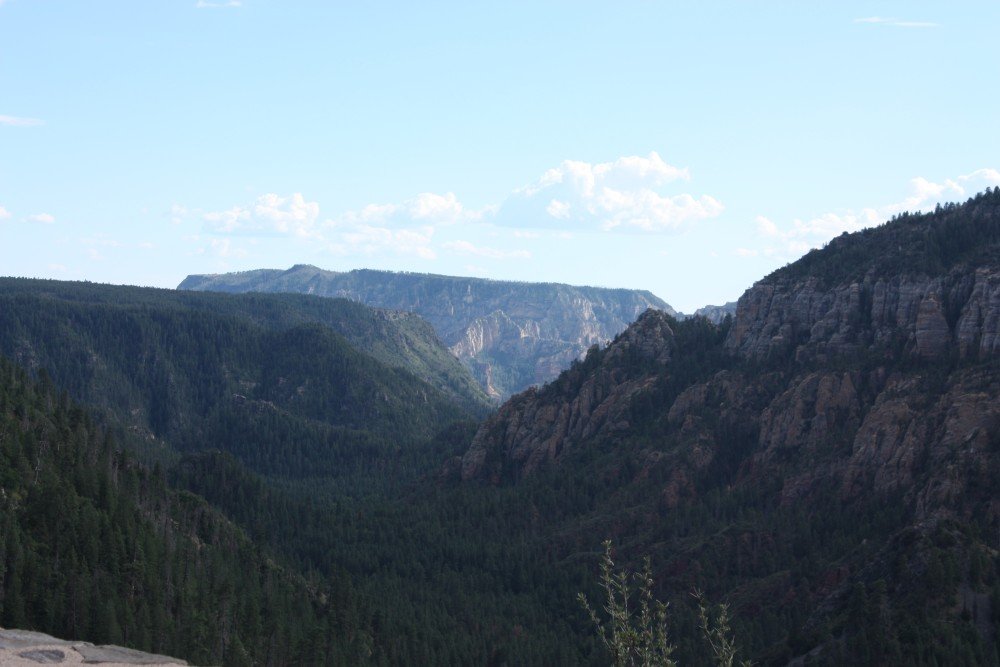
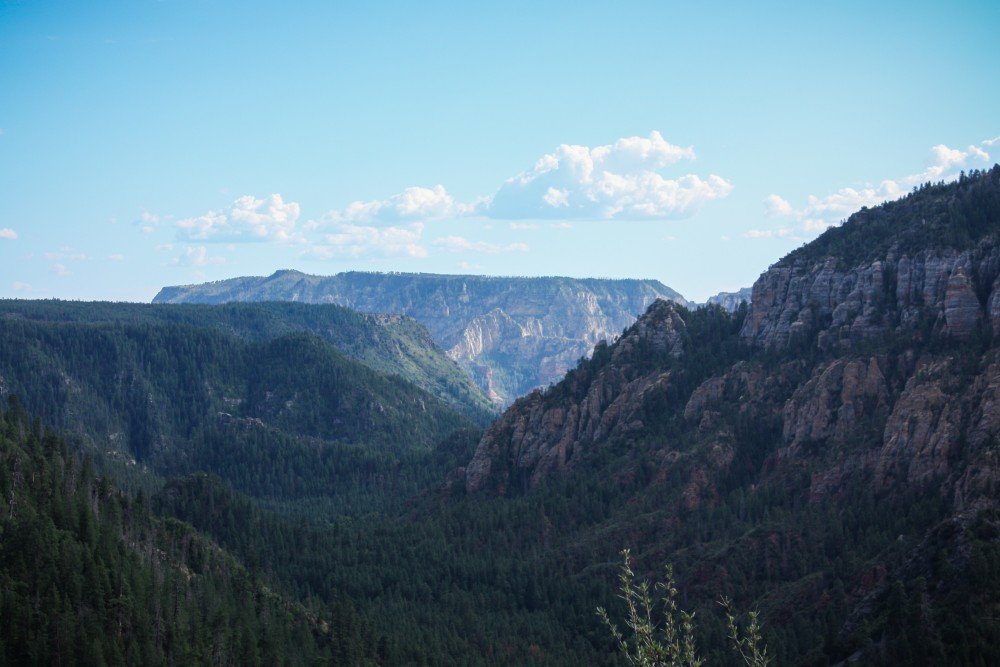
So, I’ve gone on the trip, now I have 1,000 plus photos to weed through, edit, and post to various websites and social media. This is where Adobe products come into the picture. I use Photoshop for things like stitching together panoramas because it’s great for creative editing. However, I’m typically just adjusting light, contrast, and color to convey the feeling that I want in the final photograph. This is much easier to do Lightroom (and a bonus here is that Lightroom is more affordable than Photoshop). One thing that I try to avoid is the dreaded over-edit. I’m sure by now we’ve all seen photos that look more like colored pencil drawings because of tone-mapping gone awry, or color and contrast vamped up an unnatural amount. Something that I am always trying to do is find a good balance between making the photo really pop, and staying true to the reality of the place I’ve photographed. In many situations, I find that photos don’t do justice to the feeling of actually being somewhere awe-inspiring. A prime example of this is the Grand Canyon. Sure, you can take a great picture of the Grand Canyon, but to actually stand on the canyon rim, or hike down into the chasm is an experience that you’d be hard-pressed to duplicate. What I do in a situation like this, is apply the smallest amount of editing I possibly can to make the photograph compelling. I will tweak and adjust until the image looks the same way standing on the actual scene felt, and then I won’t touch it again.

Before: The exposure is a little dark, but my main issue is that looking at this photo does give me the same feeling that seeing this canyon in person did.

After: A few very minor adjustments later, and the image compels me much more. The only alterations I made were to tweak the brightness and contrast, straightened out the angle, and add subtle vignette.
3. Know Yourself
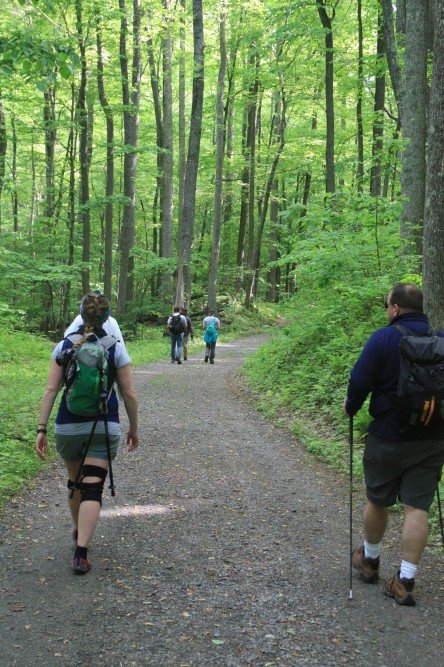
What I mean when I say “know yourself” is that you should know how much you’re willing to put up with in the name of photography. This applies to how much equipment you’re willing to pack and carry, and how much time you want to spend actually taking photos. When I’m on a road trip, I’ll pack all the cameras and equipment in my arsenal, but if I’m flying I have to pare it down a bit. I am willing to sacrifice packing extra clothes to create space for more camera equipment, but that’s not for everyone. Know what your travel essentials are, and make sure to bring the things you know you would miss, rather than packing an extra filter set you may or may not even use. After all, you’re presumably traveling with a goal of enjoying yourself, in addition to taking pictures. Also consider how you plan to carry your equipment once you’re off the plane and checked in to your accommodations. Think about how heavy your camera and accessories are, and how much of it you are willing to carry on a long day of sight-seeing. This will help you to stick to the essentials.

This is how I typically pack my equipment since most of my travels involve hiking (I’m the one on the bottom left). A small daypack will fit my camera, a spare lens, and a lunch. If I am bringing a tripod, I attach it to the outside of the bag.
So there you have it! The best advice I can give to sum things up, is to get out there and practice until you know what you’re comfortable with and what will work for you. Go on random day trips near your home to test things out so you’ll be prepared for bigger trips, and don’t forget to get some good shots of you and your companions while you’re out there. The scenery and cityscapes are great, but you’ll definitely want some pictures of yourself or your group thrown in there to look back on in the future.
Check out Kaiti’s Cape Hatteras Photo Gallery to see the tips in action!

